7.代码生成器
AutoGenerator 是 MyBatis-Plus 的代码生成器,通过 AutoGenerator 可以快速生成 Entity、Mapper、Mapper XML、Service、Controller 等各个模块的代码,极大的提升了开发效率。
特别说明:
自定义模板有哪些可用参数?Github Gitee AbstractTemplateEngine 类中方法 getObjectMap 返回 objectMap 的所有值都可用。
package com.moyisuiying.booksystem;

import com.baomidou.mybatisplus.annotation.DbType;
import com.baomidou.mybatisplus.annotation.FieldFill;
import com.baomidou.mybatisplus.generator.AutoGenerator;
import com.baomidou.mybatisplus.generator.config.*;
import com.baomidou.mybatisplus.generator.config.po.TableFill;
import com.baomidou.mybatisplus.generator.config.rules.NamingStrategy;
import com.baomidou.mybatisplus.generator.engine.FreemarkerTemplateEngine;
import java.util.ArrayList;

/**
 * Classname:GenerateCodeTest
 *
 * @description:演示例子,执行 main 方法控制台输入模块表名回车自动生成对应项目目录中
 * @author: 陌意随影
 * @Date: 2020-11-25 23:54
 * @Version: 1.0
 **/

//
public class CodeGeneratorTest {

    public static void main(String[] args) {
        // 代码生成器
        AutoGenerator mpg = new AutoGenerator();

        // 全局配置
        GlobalConfig gc = new GlobalConfig();
//        String projectPath = System.getProperty("user.dir");
//        项目的根路径
        String projectPath = "E:\\新技术学习\\java_study\\mybatis-plus学习\\booksystemWeb";
//        设置输出目录
        gc.setOutputDir(projectPath + "/src/main/java");
//        设置作者
        gc.setAuthor("陌意随影");
//        设置是否打开
        gc.setOpen(false);
        //第二次生成的把第一次覆盖掉
        gc.setFileOverride(true);
        //mapper 命名方式,默认值:null 例如:%sDao 生成 UserDao
        gc.setMapperName("%sMapper");
        //生成的service接口名字首字母是否为I,这样设置就没有I
        gc.setServiceName("%sService");
        //service impl 命名方式,默认值:null 例如:%sBusinessImpl 生成 UserBusinessImpl
        gc.setServiceImplName(null);

        // gc.setSwagger2(true); 实体属性 Swagger2 注解
        gc.setSwagger2(true);
        mpg.setGlobalConfig(gc);

        // 数据源配置
        DataSourceConfig dsc = new DataSourceConfig();
//        设置数据的URL
        dsc.setUrl("jdbc:mysql://localhost:3306/javaweb?serverTimezone=UTC&useUnicode=true&useSSL=false&characterEncoding=utf8");
        // dsc.setSchemaName("public");
//        设置数据库的驱动
        dsc.setDriverName("com.mysql.cj.jdbc.Driver");
//        设置数据库连接的用户名
        dsc.setUsername("root");
//        设置数据库连接的用密码
        dsc.setPassword("root");
//        设置数据库类型
        dsc.setDbType(DbType.MYSQL);
        mpg.setDataSource(dsc);

        // 包配置
        PackageConfig pc = new PackageConfig();
//        设置项目模块名
        pc.setModuleName("booksystem");
//        设置父类名
        pc.setParent("com.moyisuiying");
//        设置实体类包名
        pc.setEntity("entity");
//        设置控制器包名
        pc.setController("controller");
//        设置业务逻辑包名
        pc.setService("service");
//        设置mapper的包名
        pc.setMapper("mapper");
        mpg.setPackageInfo(pc);


        // 策略配置
        StrategyConfig strategy = new StrategyConfig();
//        设置表名到实体类间的映射规则,表AccountPart 到实体类的 表AccountPart是一致的,没还有发生变化
        strategy.setNaming(NamingStrategy.no_change);
//        设置表的列属性到实体类属性名的映射规则,这里设置了没有改变,比如 表中的 nickName 到实体类的 nickName是一致的,没还有发生变化
        strategy.setColumnNaming(NamingStrategy.no_change);
//        strategy.setSuperEntityClass();
//        给实体类设置自动lombok
        strategy.setEntityLombokModel(true);
//        生成@RestController控制器
        strategy.setRestControllerStyle(true);
        // 公共父类
//        strategy.setSuperControllerClass("你自己的父类控制器,没有就不用设置!");
        // 写于父类中的公共字段
        strategy.setSuperEntityColumns("id");
//        设置要映射的数据库表名
        strategy.setInclude("account","book","borrowbook");
//        设置逻辑删除的字段名称
        strategy.setLogicDeleteFieldName("deleted");
//        设置乐观锁
        strategy.setVersionFieldName("version");
        strategy.setControllerMappingHyphenStyle(true);
        // 自动填充配置
        TableFill gmtCreate = new TableFill("createTime", FieldFill.INSERT);
        TableFill gmtModified = new TableFill("updateTime",FieldFill.INSERT_UPDATE);
        ArrayList<TableFill> tableFills = new ArrayList<>();
        tableFills.add(gmtCreate);
        tableFills.add(gmtModified);
        strategy.setTableFillList(tableFills);
        mpg.setStrategy(strategy);
        mpg.setTemplateEngine(new FreemarkerTemplateEngine());
        //执行生成代码
        mpg.execute();
    }

}
创建过程中需要用到的三个完整的表:
CREATE TABLE `account` (
  `id` int(11) NOT NULL AUTO_INCREMENT COMMENT 'id主键,自增',
  `name` varchar(32) DEFAULT NULL,
  `password` varchar(50) NOT NULL COMMENT '密码',
  `createTime` datetime DEFAULT CURRENT_TIMESTAMP,
  `status` int(11) DEFAULT '0',
  `type` int(11) DEFAULT NULL,
  `sex` varchar(4) DEFAULT NULL,
  `hobby` varchar(128) DEFAULT NULL,
  `signature` varchar(128) DEFAULT NULL,
  `age` int(4) DEFAULT NULL,
  `deleted` tinyint(1) NOT NULL DEFAULT '0',
  `version` int(11) NOT NULL DEFAULT '1',
  `updateTime` datetime DEFAULT NULL COMMENT '修改时间',
  PRIMARY KEY (`id`),
  UNIQUE KEY `name` (`name`)
) ENGINE=InnoDB AUTO_INCREMENT=30 DEFAULT CHARSET=utf8 COMMENT='用户表';

CREATE TABLE `book` (
  `id` int(11) NOT NULL AUTO_INCREMENT COMMENT 'id主键,自增',
  `name` varchar(50) NOT NULL COMMENT '书名',
  `author` varchar(50) NOT NULL COMMENT '作者',
  `price` double NOT NULL COMMENT '价格',
  `type` varchar(10) DEFAULT NULL,
  `status` int(11) DEFAULT '0',
  `description` varchar(128) DEFAULT NULL,
  `sbn` varchar(32) DEFAULT NULL,
  `createTime` datetime DEFAULT NULL,
  `version` int(11) NOT NULL DEFAULT '1',
  `updateTime` datetime DEFAULT NULL COMMENT '更新时间',
  PRIMARY KEY (`id`)
) ENGINE=InnoDB AUTO_INCREMENT=62 DEFAULT CHARSET=utf8 COMMENT='书籍表';

CREATE TABLE `borrowbook` (
  `accountid` int(11) DEFAULT NULL,
  `bookid` int(11) DEFAULT NULL,
  `borrowtime` datetime DEFAULT NULL,
  `returntime` datetime DEFAULT NULL,
  `id` int(11) NOT NULL AUTO_INCREMENT,
  `version` int(11) NOT NULL DEFAULT '1',
  `updateTime` datetime DEFAULT NULL COMMENT '修改时间',
  `deleted` tinyint(1) NOT NULL DEFAULT '0' COMMENT '逻辑删除标识',
  `createTime` datetime DEFAULT NULL COMMENT '创建时间',
  PRIMARY KEY (`id`)
) ENGINE=InnoDB AUTO_INCREMENT=10 DEFAULT CHARSET=utf8;
7.1使用教程
MyBatis-Plus 从 3.0.3 之后移除了代码生成器与模板引擎的默认依赖,需要手动添加相关依赖:
7.1.1添加 代码生成器 依赖
<dependency>
    <groupId>com.baomidou</groupId>
    <artifactId>mybatis-plus-generator</artifactId>
    <version>3.4.1</version>
</dependency>
7.1.2添加 模板引擎 依赖,MyBatis-Plus 支持 Velocity(默认)、Freemarker、Beetl,用户可以选择自己熟悉的模板引擎,如果都不满足您的要求,可以采用自定义模板引擎。
Velocity(默认):
<dependency>
    <groupId>org.apache.velocity</groupId>
    <artifactId>velocity-engine-core</artifactId>
    <version>2.2</version>
</dependency>
Freemarker:
<dependency>
    <groupId>org.freemarker</groupId>
    <artifactId>freemarker</artifactId>
    <version>2.3.30</version>
</dependency>
Beetl:
<dependency>
    <groupId>com.ibeetl</groupId>
    <artifactId>beetl</artifactId>
    <version>3.2.4.RELEASE</version>
</dependency>
注意!如果您选择了非默认引擎,需要在 AutoGenerator 中 设置模板引擎。
AutoGenerator generator = new AutoGenerator();

// set freemarker engine
generator.setTemplateEngine(new FreemarkerTemplateEngine());

// set beetl engine
generator.setTemplateEngine(new BeetlTemplateEngine());

// set custom engine (reference class is your custom engine class)
generator.setTemplateEngine(new CustomTemplateEngine());

// other config
...
7.2编写配置
MyBatis-Plus 的代码生成器提供了大量的自定义参数供用户选择,能够满足绝大部分人的使用需求。
- 配置 GlobalConfig
  GlobalConfig globalConfig = new GlobalConfig();
  globalConfig.setOutputDir(System.getProperty("user.dir") + "/src/main/java");
  globalConfig.setAuthor("jobob");
globalConfig.setOpen(false);- 配置 DataSourceConfig
  DataSourceConfig dataSourceConfig = new DataSourceConfig();
  dataSourceConfig.setUrl("jdbc:mysql://localhost:3306/ant?useUnicode=true&useSSL=false&characterEncoding=utf8");
  dataSourceConfig.setDriverName("com.mysql.jdbc.Driver");
  dataSourceConfig.setUsername("root");
  dataSourceConfig.setPassword("password");
7.3自定义模板引擎
请继承类 com.baomidou.mybatisplus.generator.engine.AbstractTemplateEngine
7.4自定义代码模板
//指定自定义模板路径, 位置:/resources/templates/entity2.java.ftl(或者是.vm)
//注意不要带上.ftl(或者是.vm), 会根据使用的模板引擎自动识别
TemplateConfig templateConfig = new TemplateConfig()
    .setEntity("templates/entity2.java");

AutoGenerator mpg = new AutoGenerator();
//配置自定义模板
mpg.setTemplate(templateConfig);
7.5自定义属性注入
InjectionConfig injectionConfig = new InjectionConfig() {
    //自定义属性注入:abc
    //在.ftl(或者是.vm)模板中,通过${cfg.abc}获取属性
    @Override
    public void initMap() {
        Map<String, Object> map = new HashMap<>();
        map.put("abc", this.getConfig().getGlobalConfig().getAuthor() + "-mp");
        this.setMap(map);
    }
};
AutoGenerator mpg = new AutoGenerator();
//配置自定义属性注入
mpg.setCfg(injectionConfig);
entity2.java.ftl
自定义属性注入abc=${cfg.abc}

entity2.java.vm
自定义属性注入abc=$!{cfg.abc}
7.6字段其他信息查询注入
![[外链图片转存失败,源站可能有防盗链机制,建议将图片保存下来直接上传(img-LVSgwljs-1607188884970)(E:\新技术学习\java_study\mybatis-plus学习\images\custom-fields.png)]](https://img-blog.csdnimg.cn/20201206012234298.png?x-oss-process=image/watermark,type_ZmFuZ3poZW5naGVpdGk,shadow_10,text_aHR0cHM6Ly9ibG9nLmNzZG4ubmV0L3UwMTE4NzAwMjI=,size_16,color_FFFFFF,t_70)
new DataSourceConfig().setDbQuery(new MySqlQuery() {

    /**
     * 重写父类预留查询自定义字段<br>
     * 这里查询的 SQL 对应父类 tableFieldsSql 的查询字段,默认不能满足你的需求请重写它<br>
     * 模板中调用:  table.fields 获取所有字段信息,
     * 然后循环字段获取 field.customMap 从 MAP 中获取注入字段如下  NULL 或者 PRIVILEGES
     */
    @Override
    public String[] fieldCustom() {
        return new String[]{"NULL", "PRIVILEGES"};
    }
})7.7更详细的配置:https://baomidou.com/config/generator-config.html
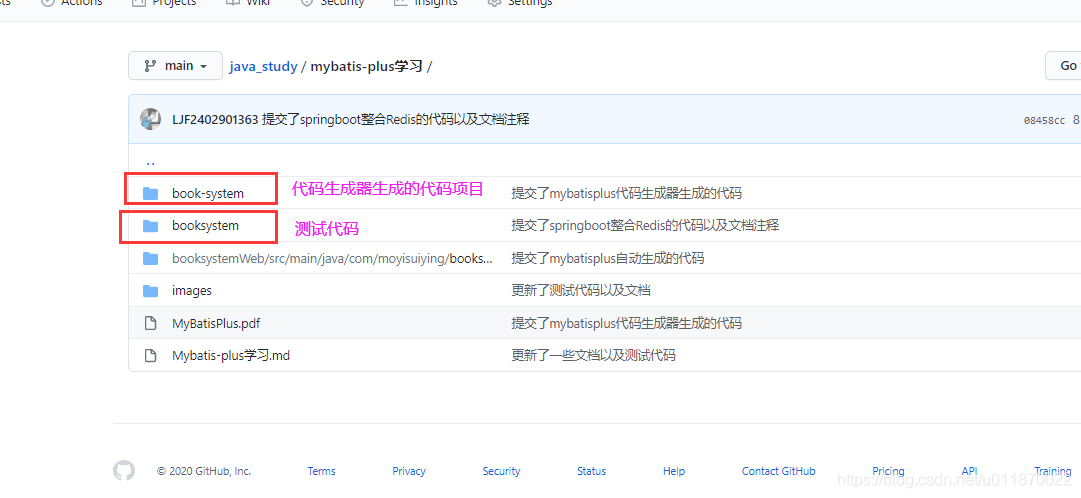
7.8.测试的源代码已上传到GitHub中:https://github.com/LJF2402901363/java_study.git


